Build a RaspiBlitz
The RaspiBlitz is a Bitcoin and Lightning node, in a fun and reliable package. It has 1-click install for many apps & services like Sphinx-Relay, Ride the Lightning, BTCPayServer, Specter Desktop, and many more.
This guide walks you through the process of building your very own.
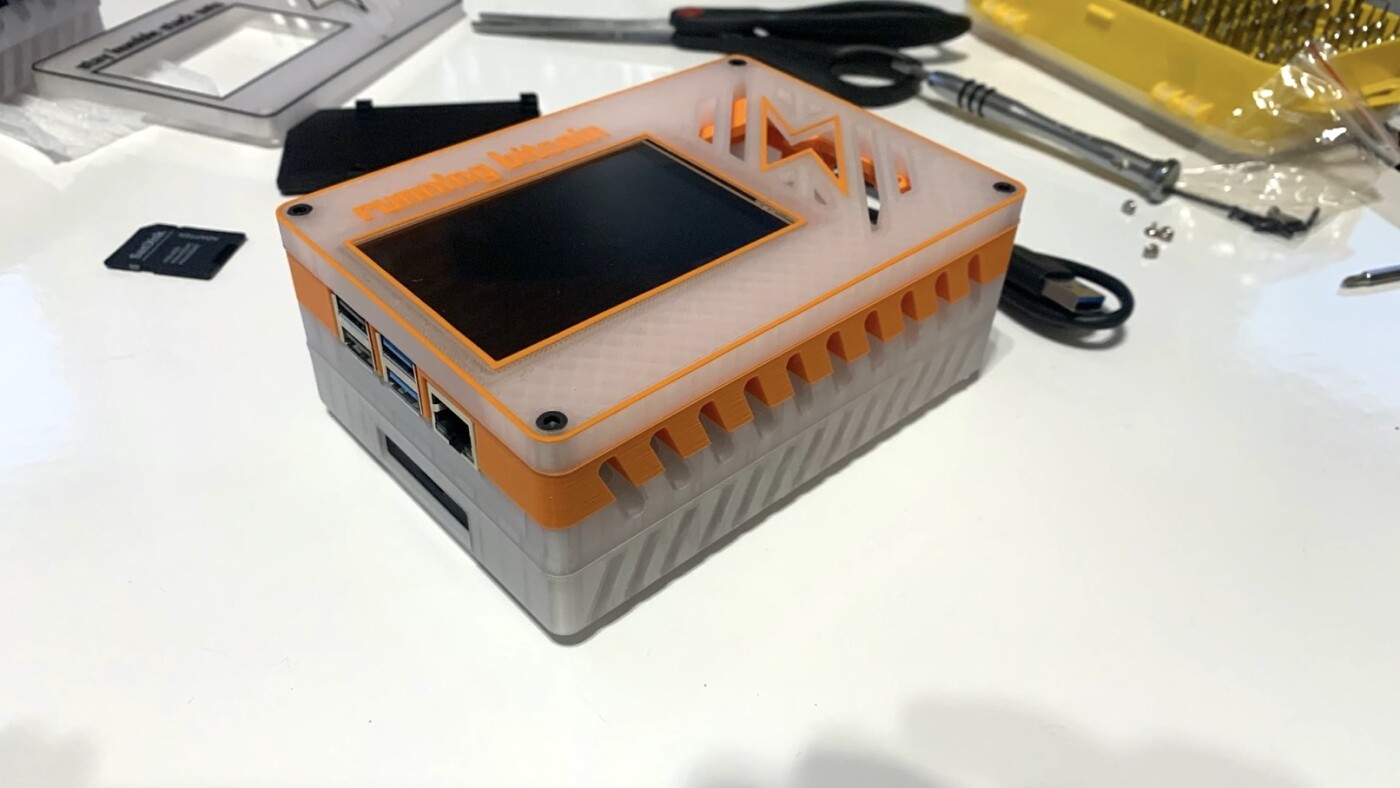
This guide is made-up of four major components:
Your primary interactions for setting up the RaspiBlitz will be over SSH. This can be a little intimidating if you are not familiar with the Linux terminal — but know that it will be a great experience to have under your belt.
Parts
I’ve built a RaspiBlitz running v1.6.3 with these parts and can confirm that everything just works out of the box.
The LCD Display is optional; it’s a nice touch for the RaspiBlitz, I highly recommend it. The display I use in this guide is compatible with the RaspiBlitz out of the box. No special set-up needed.
As an Amazon Associate I earn from qualifying purchases.
- Crypto Cloaks Lightning Shell [Check LCD option]
- Waveshare Raspberry Pi LCD Display Module 3.5inch [Optional]
- Raspberry Pi 4 Model B 2019 Quad Core 64 Bit WiFi Bluetooth (4GB)
- Raspberry Pi 4 Power Supply USB-C 5.1V 3A
- Raspberry Pi 4 Armor Case
- Samsung PRO Endurance 32GB 100MB/s (U1) MicroSDXC Memory Card
- SAMSUNG T5 Portable SSD 1TB
Flash RaspiBlitz onto SD Card
We are preparing the SD card with the RaspiBlitz OS, to have it ready to go into the RaspiBlitz when we build it next.
- Download the latest version of RaspiBlitz.
- Verify the signature (OS X instructions).
- Download Balena Etcher.
- Install Balena Etcher.
- Burn the RaspiBlitz update image onto the new SD card.
- Flash from file
- Select file you just downloaded i.e.
raspiblitz-v1.6.3-2021-01-13.img.gz - Select target: the SD card.
- Flash!
Verify the signature
- Download GPG Suite.
- To verify that the download was actually signed by rootzoll you need to use GPG and import the following public key:
curl https://keybase.io/rootzoll/pgp_keys.asc | gpg --import
- After this download the “signature file” for the sd card image. It’s the same download link as for the image file - just added a .sig at the end. You should also find the download link for the signature file always in the README right below the image download link following the SIGNATURE link.
- Now that you have all three elements needed — the imported public key, the image signature and the image file itself — you can verify the download with:
gpg --verify [SIGNATURE-FILE] [IMAGE-FILE]
i.e.
Downloads ❯ gpg --verify raspiblitz-v1.6.3-2021-01-13.img.gz.sig raspiblitz-v1.6.3-2021-01-13.img.gz
gpg: Signature made Mon Nov 30 16:48:41 2020 PST
gpg:                using RSA key C0EE614531A416B4CDB7A2D7AA9DD1B5CC5647DA
gpg: Good signature from "Christian Rotzoll <christian@rotzoll.de>" [unknown]
gpg: WARNING: This key is not certified with a trusted signature!
gpg:          There is no indication that the signature belongs to the owner.
Primary key fingerprint: 92A7 46AE 33A3 C186 D014  BF5C 1C73 060C 7C17 6461
     Subkey fingerprint: C0EE 6145 31A4 16B4 CDB7  A2D7 AA9D D1B5 CC56 47DA
Build the Hardware
Now we have to assemble the RaspiBlitz. Take it one step at a time. Trust the process.
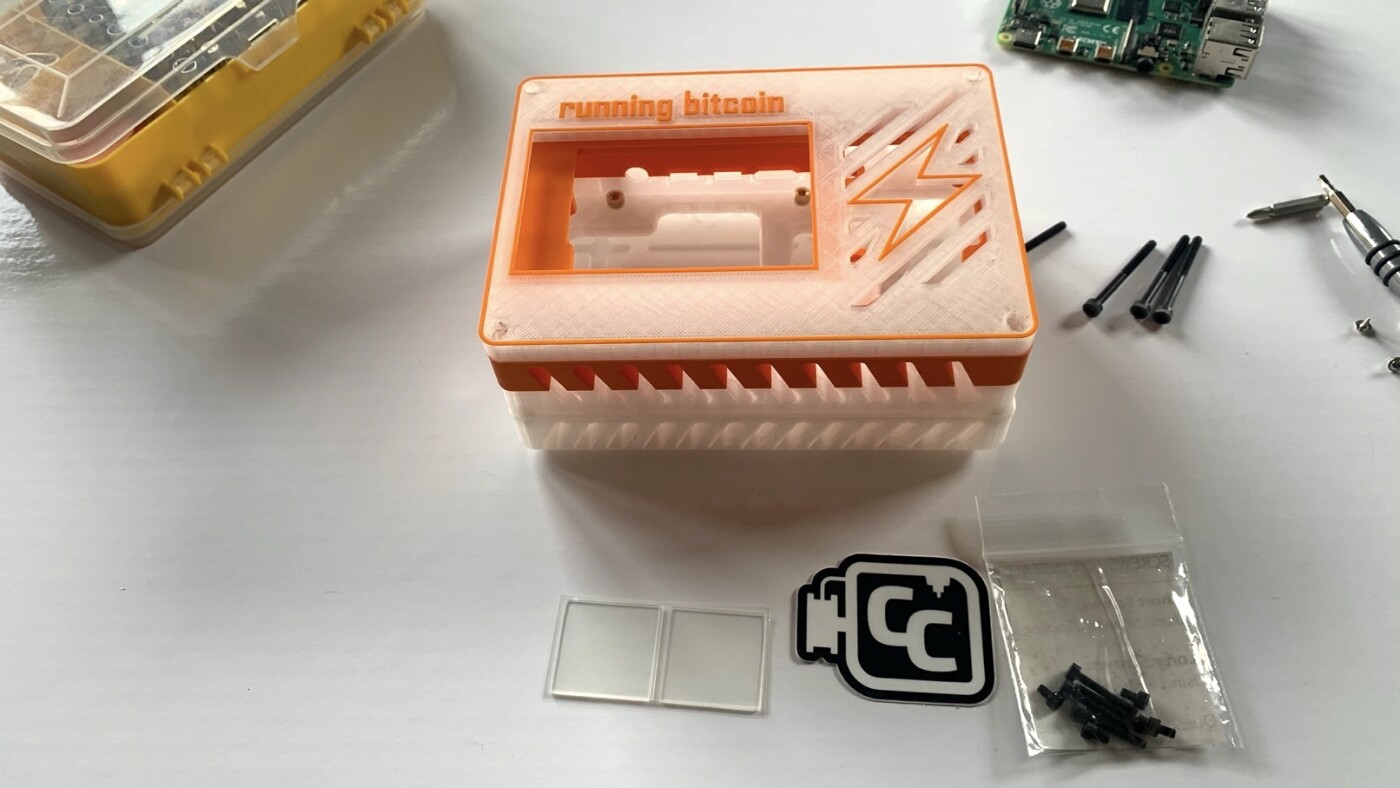
1. Unscrew the Lightning Shell
Remove the four screws that hold together the lightning shell.
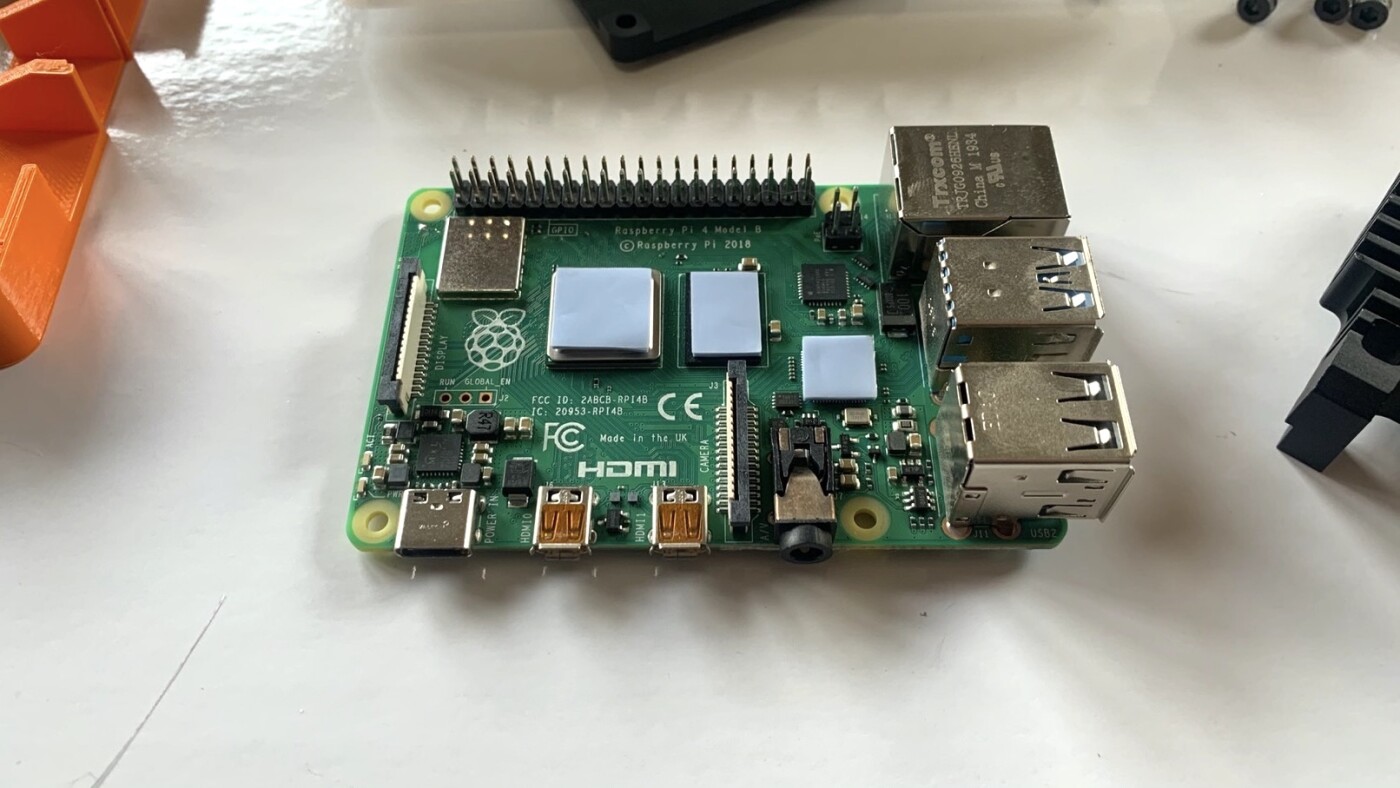
2. Prep the Raspberry Pi to install the Armor Heatsink
Place heatsink tape on top of Raspberry Pi chips, to insulate from direct contact with the Armor Heatsink, which we are about to install.
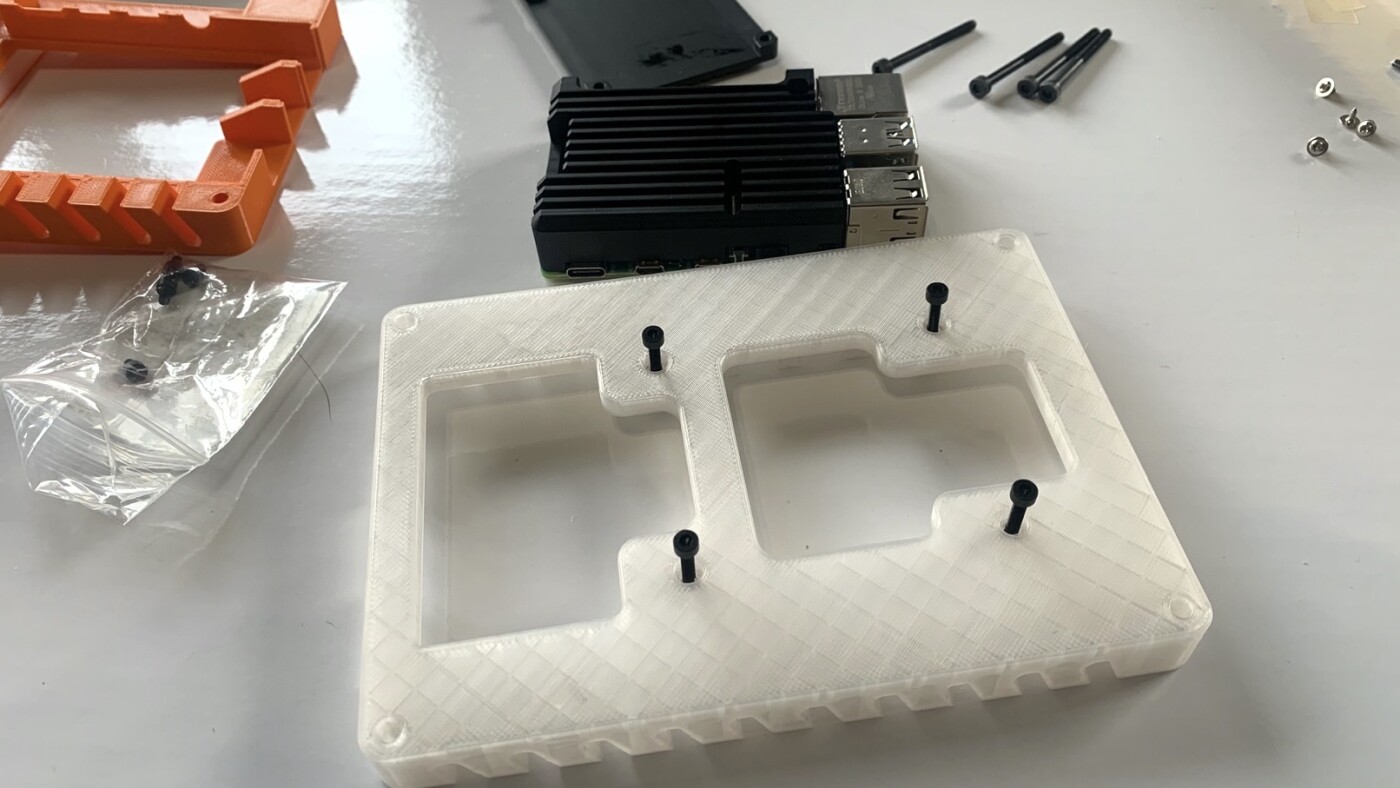
3. Insert screws that will secure Raspberry Pi
Insert the screws with a slight tork. You will place the Raspberry Pi and Armor Heatsink on the other side next and line them up with the screws.
4. Secure the Raspberry Pi and Armor Heatsink
Note that we won’t use the bottom part of the Armor Case when installing in the lightning shell.
Place the Raspberry Pi and line it up with the screws you prepared in the previous step. Place Armor Heatsink on top, also lining up the holes for the screws. Secure it all in place by torking the screws. I suggest you get all four screws in a bit before you tighthen them all the way.
Double check to make sure everything is secured in place properly and nothing is crooked.
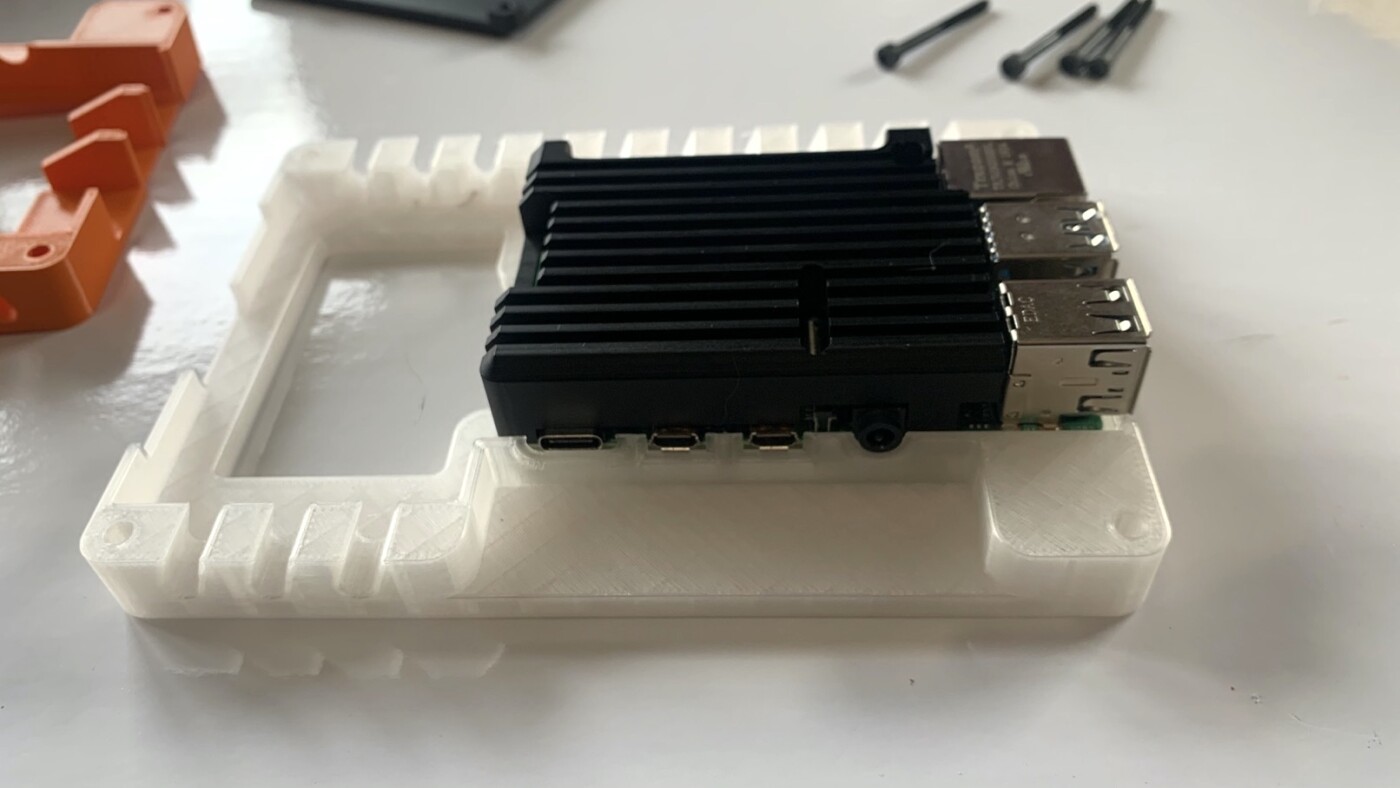
5. Prep lightning shell to stick the hard drive
Measure the spots for placing the hard drive tape. Make sure the hard drive can stick flush to the port outlet. Stick the hard drive tape to the case where the hard drive will sit.
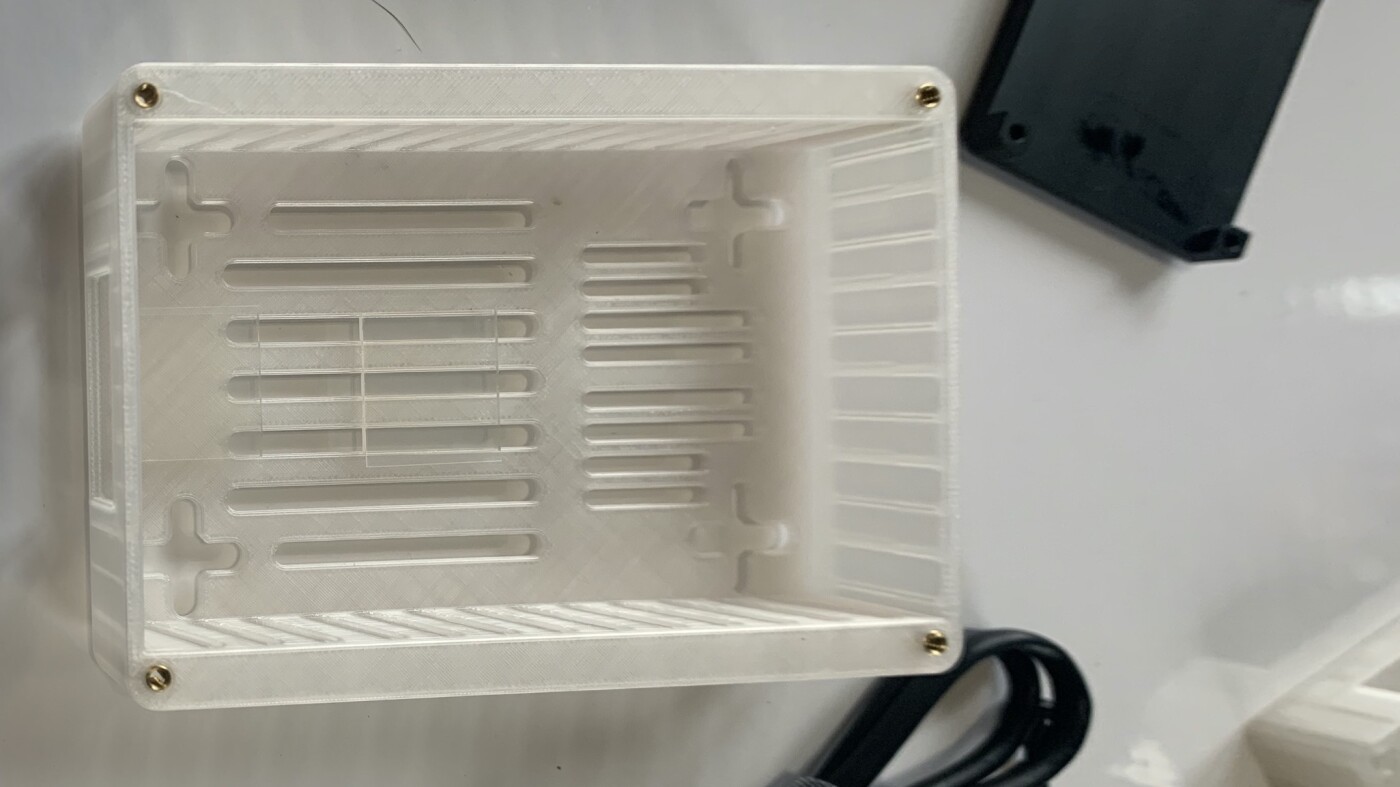
6. Install Hard Drive
Simply stick the hard drive in place on the tape. Apply some pressure to make sure it is secured in place.
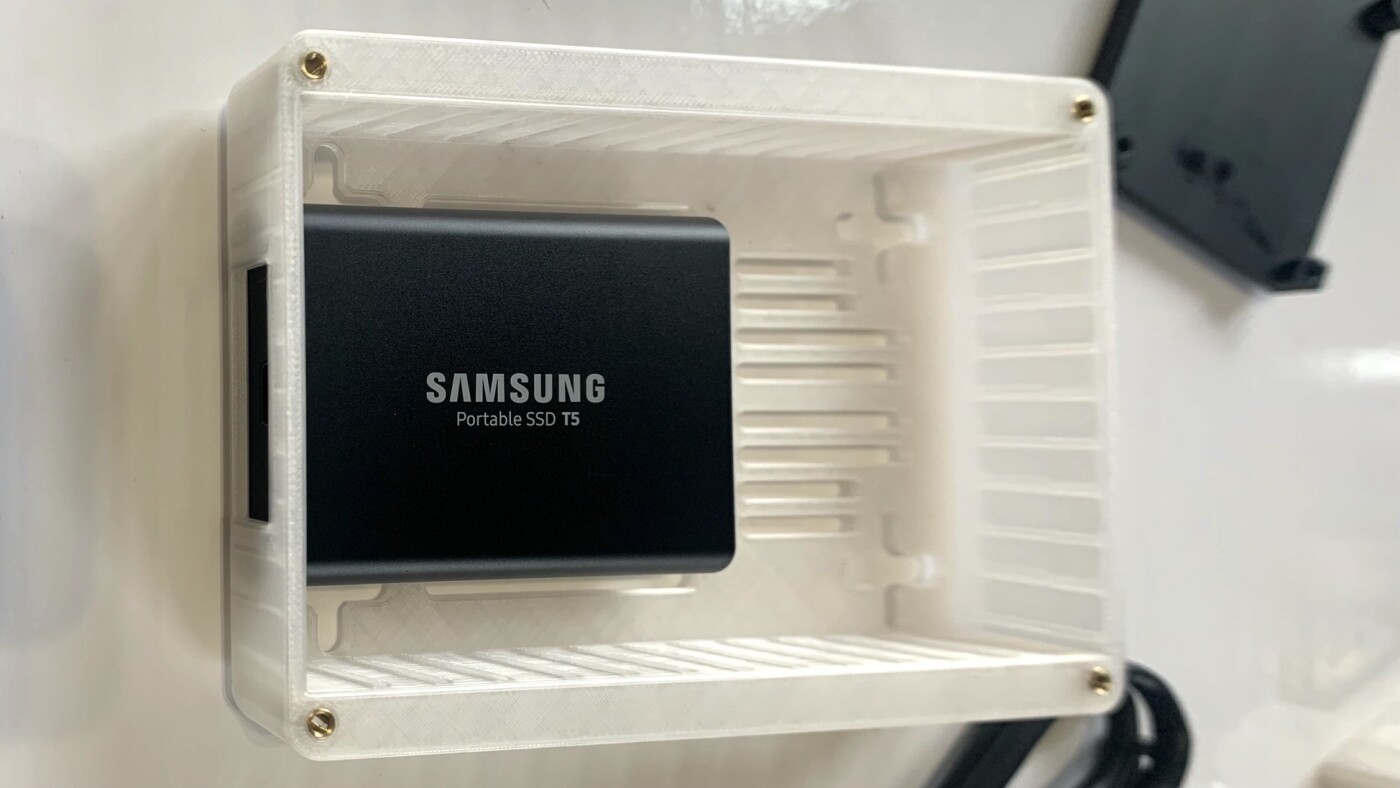
7. Install LCD Display
Insert LCD into the Raspberry Pi 40-Pin GPIO (General Purpose Input/Output) header.
Note that we have also placed and lined up the third layer of the Lightning shell before installing the LCD display.
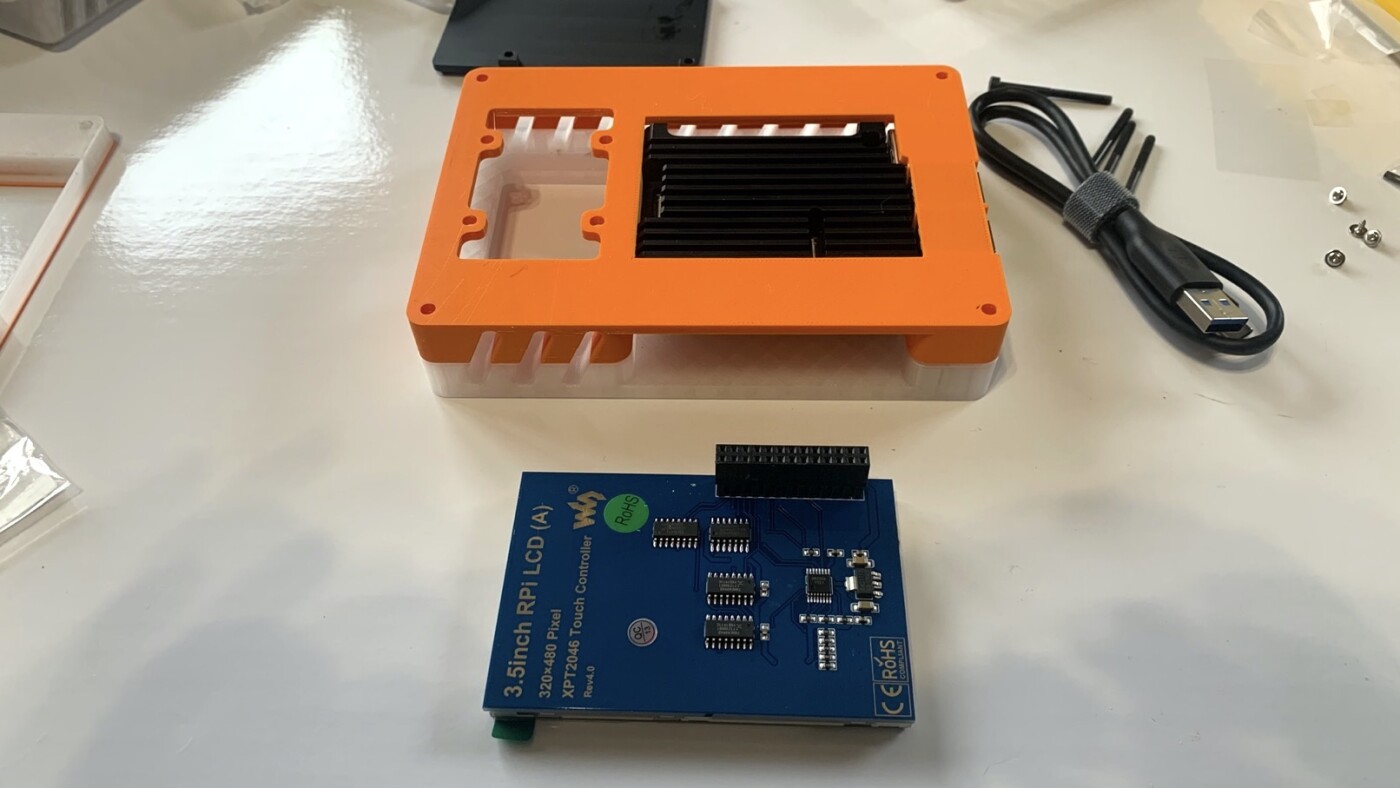
Make sure to line-up the ports on the left.
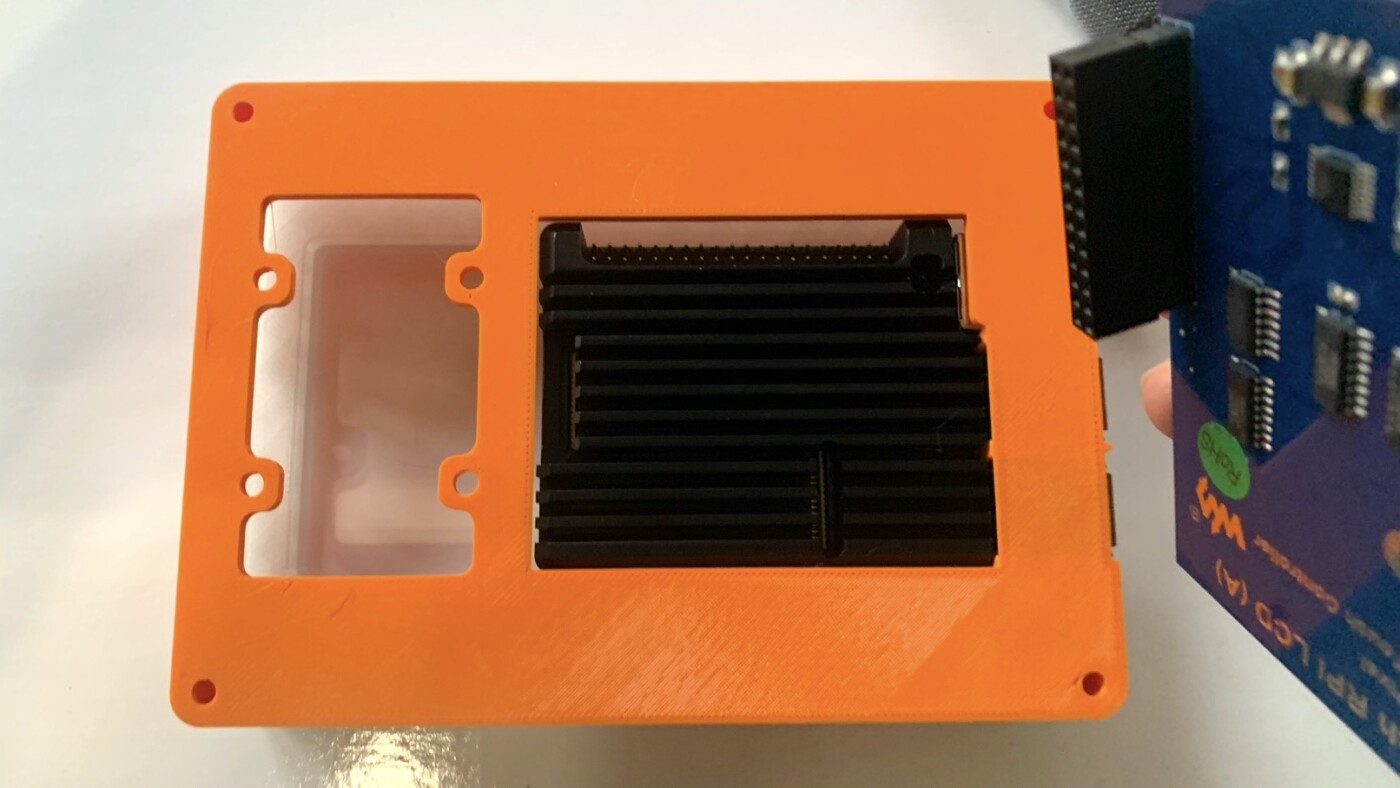
Make sure the LCD display is inserted flush.
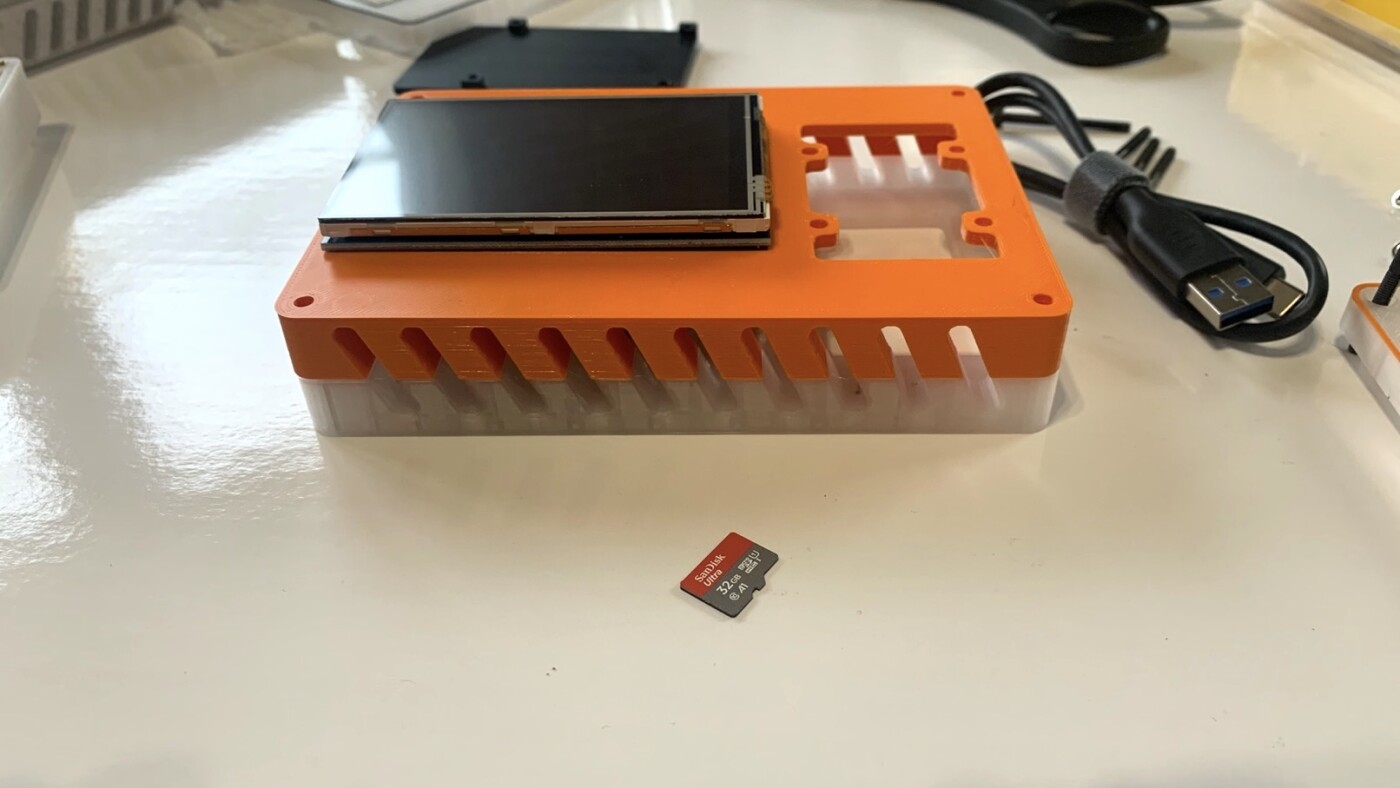
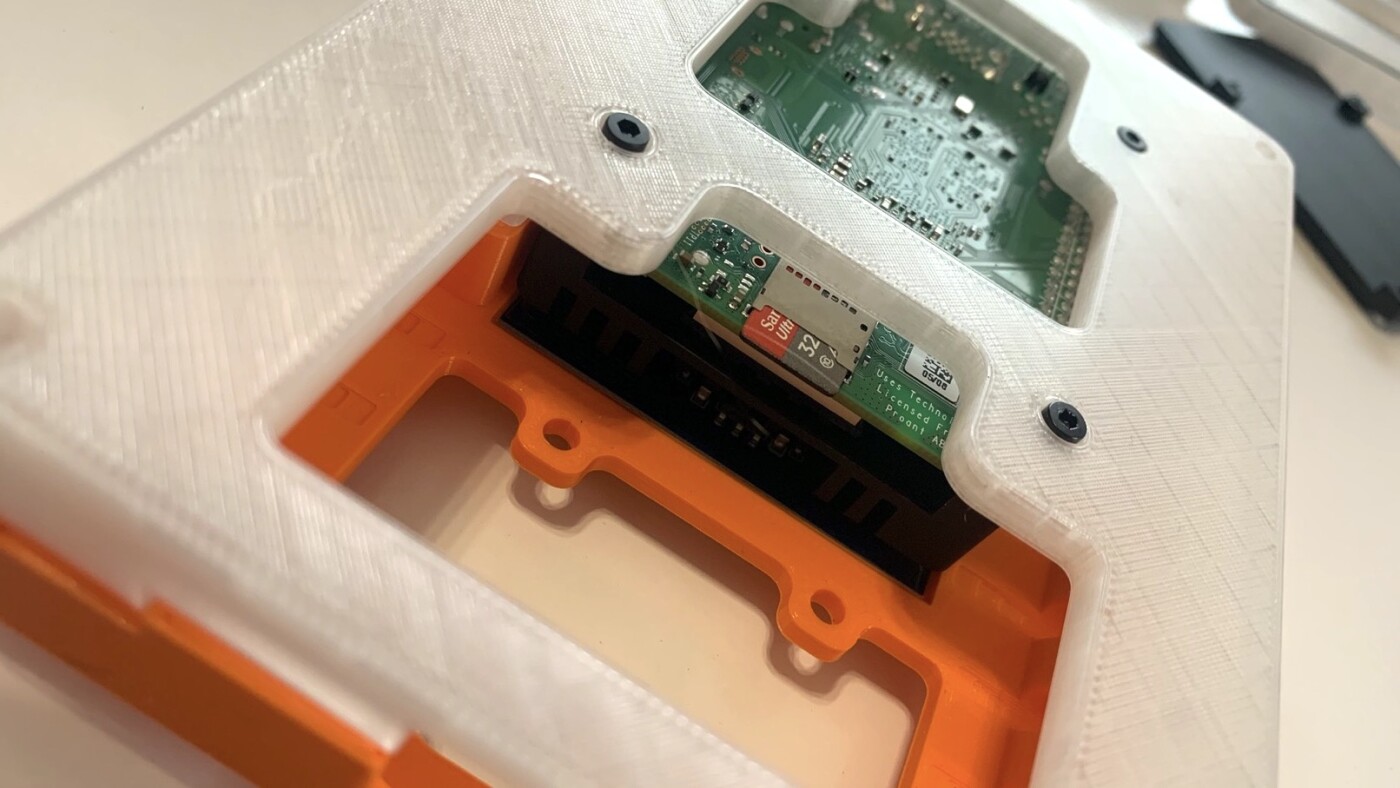
8. Insert SD Card in RaspiBlitz
Insert the 32GB SD Card into the Raspberry Pi. This is the SD card that we prepared at the very beginning of the guide.
9. Close-up the Lightning Case
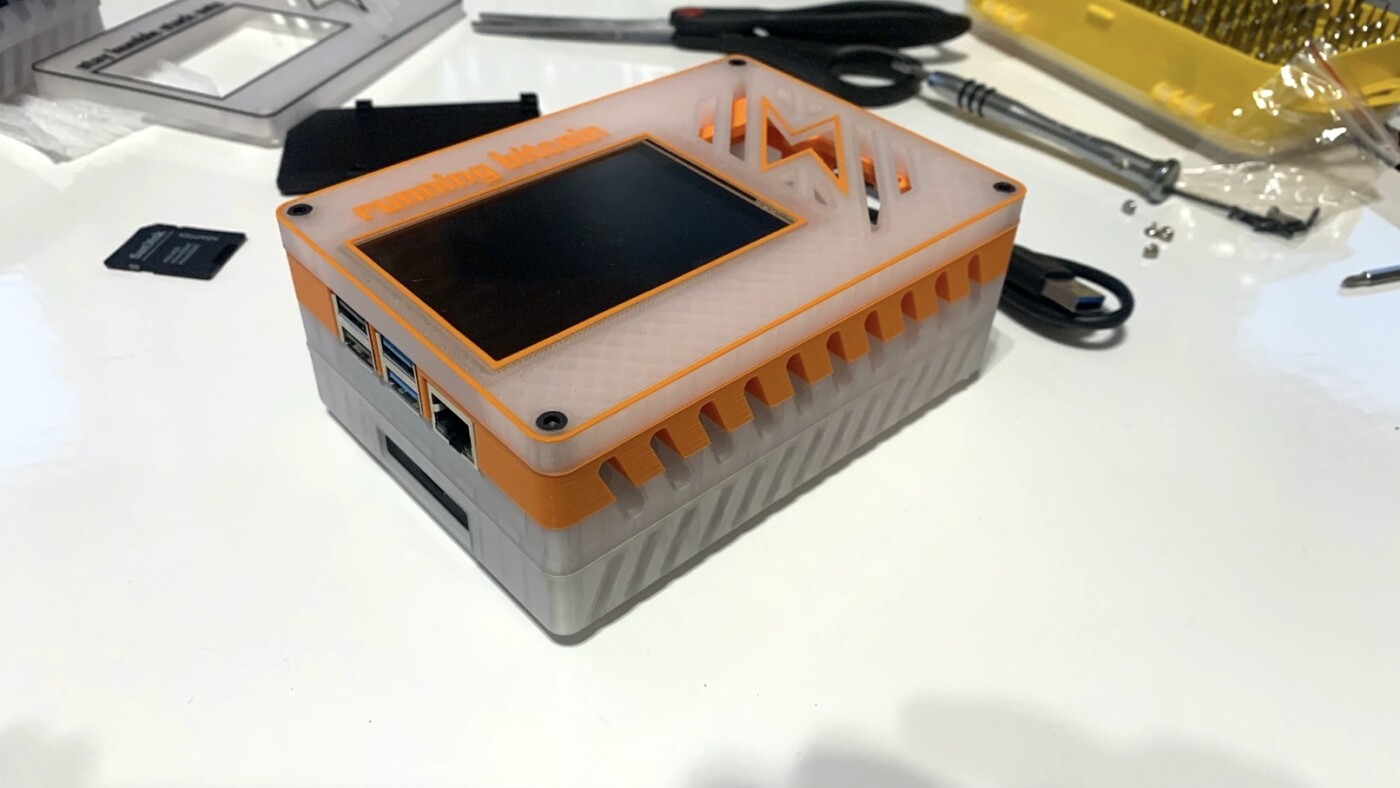
Now that all the components are installed and secured in place, let’s stack the lightning shell and screw it closed. Hard drive bay at the bottom, Raspberry Pi and LCD display on top — note that the ports are all on the same side.
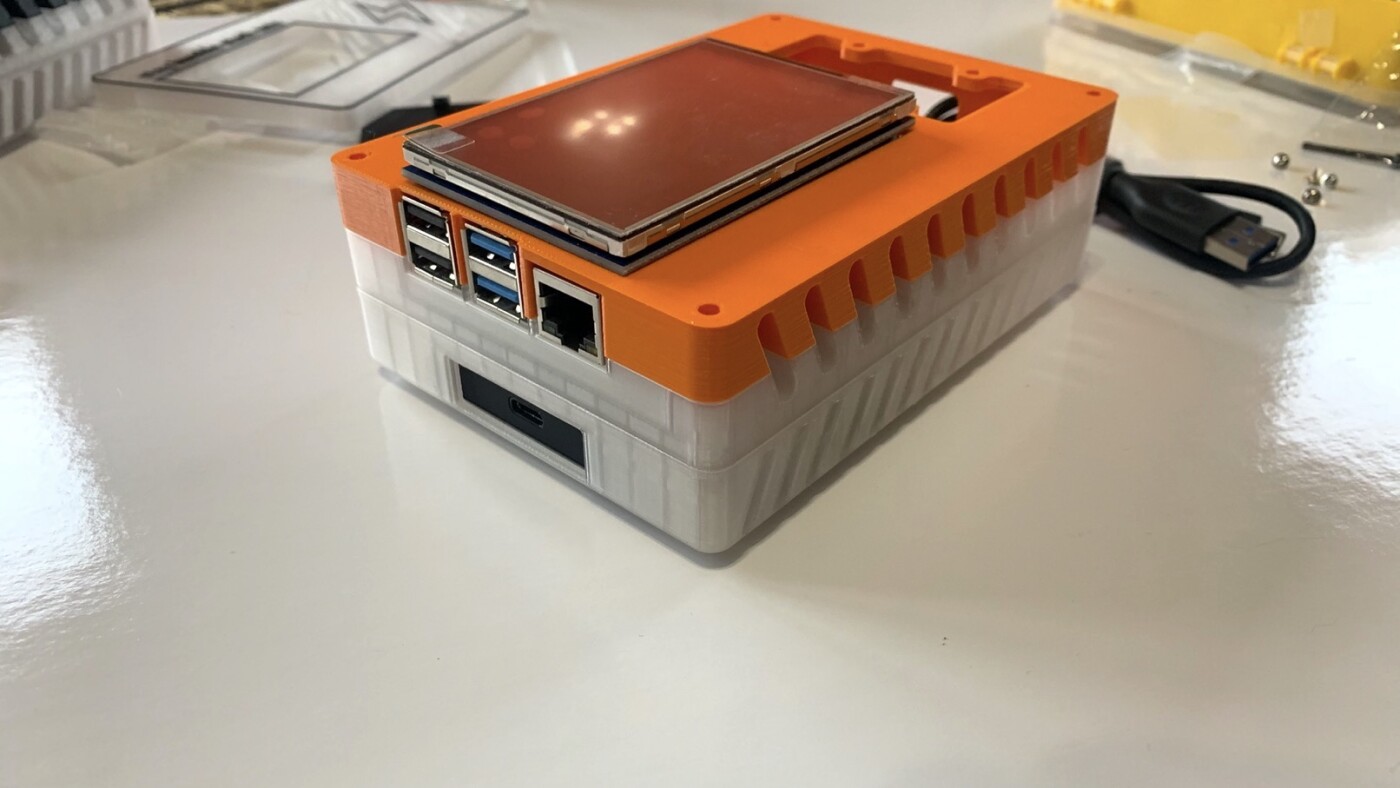
Place the top layer of the lightning shell and make sure the screw holes line up all the way down through the layers.
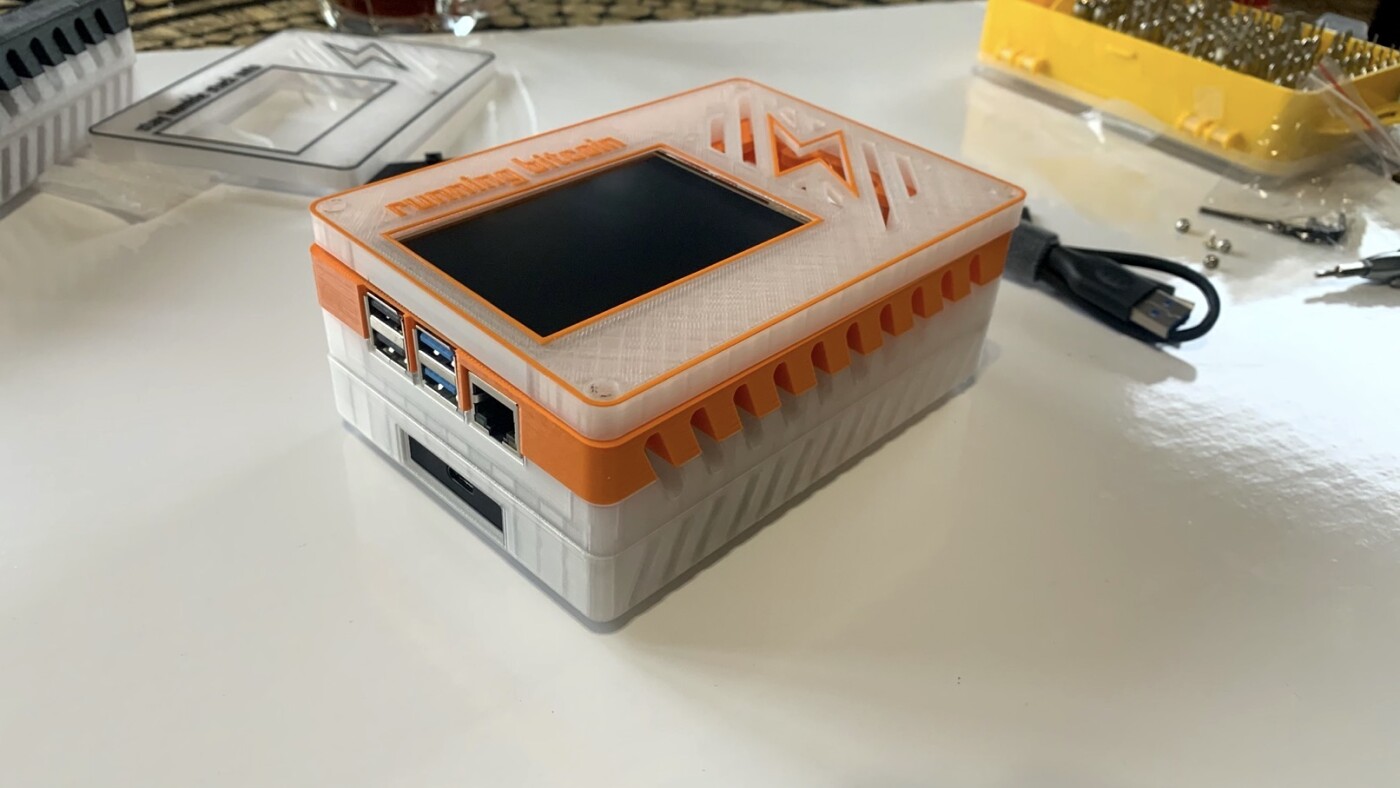
Screw the lightning shell closed by torking the screws. I suggest you make sure the case and screws are all lined up properly by lightly torking each screw first, then secure them all the way.
Install the Software
1. Power up the RaspiBlitz
Plug-in the hard drive, ethernet, and power cables.
2. SSH into the RaspiBlitz
The IP address will show-up on the LCD display i.e. 192.168.0.184.
ssh admin@192.168.0.184
The default password is raspiblitz.
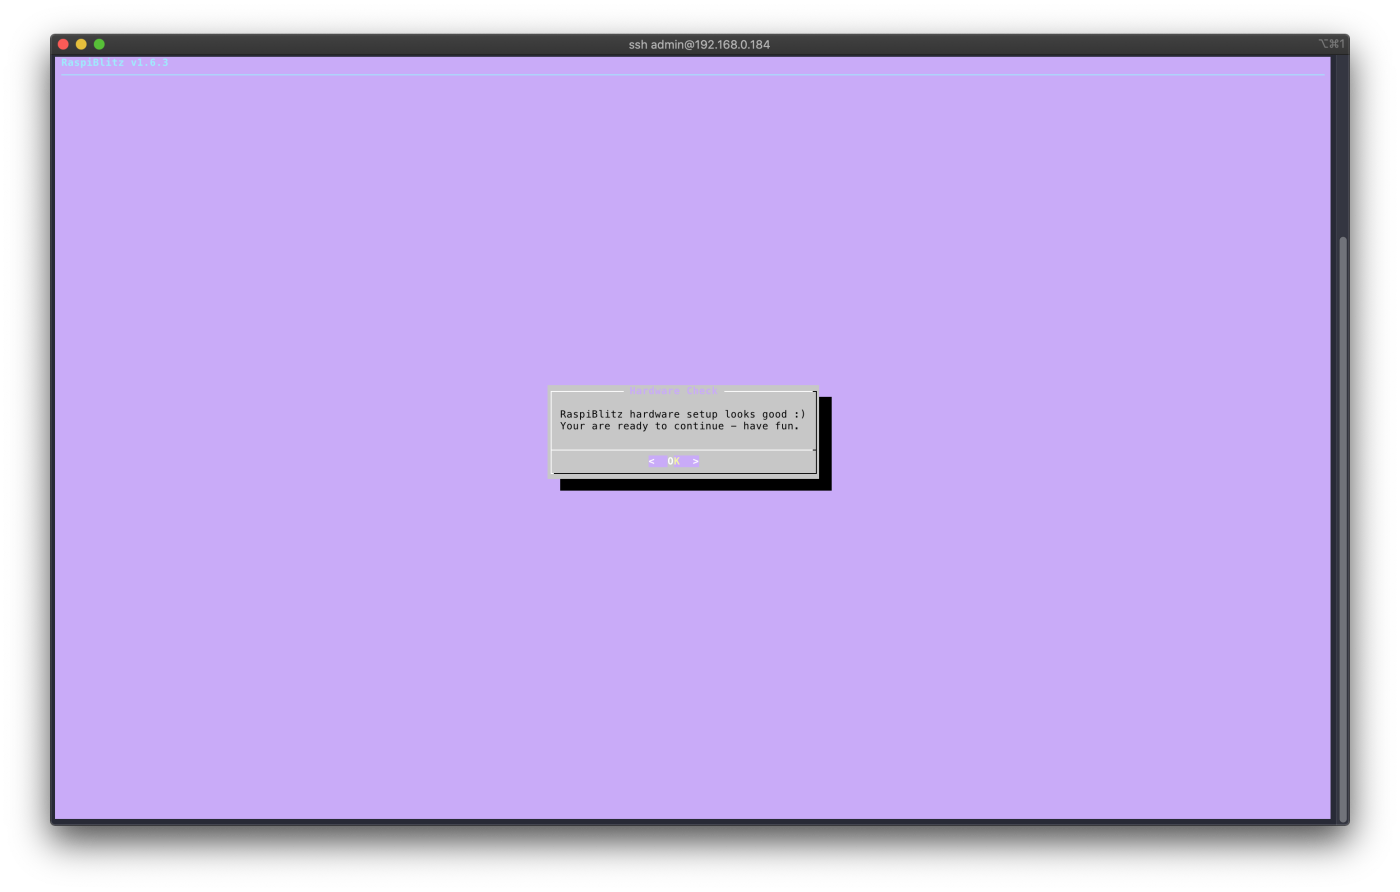
3. The RaspiBlitz will self-diagnose
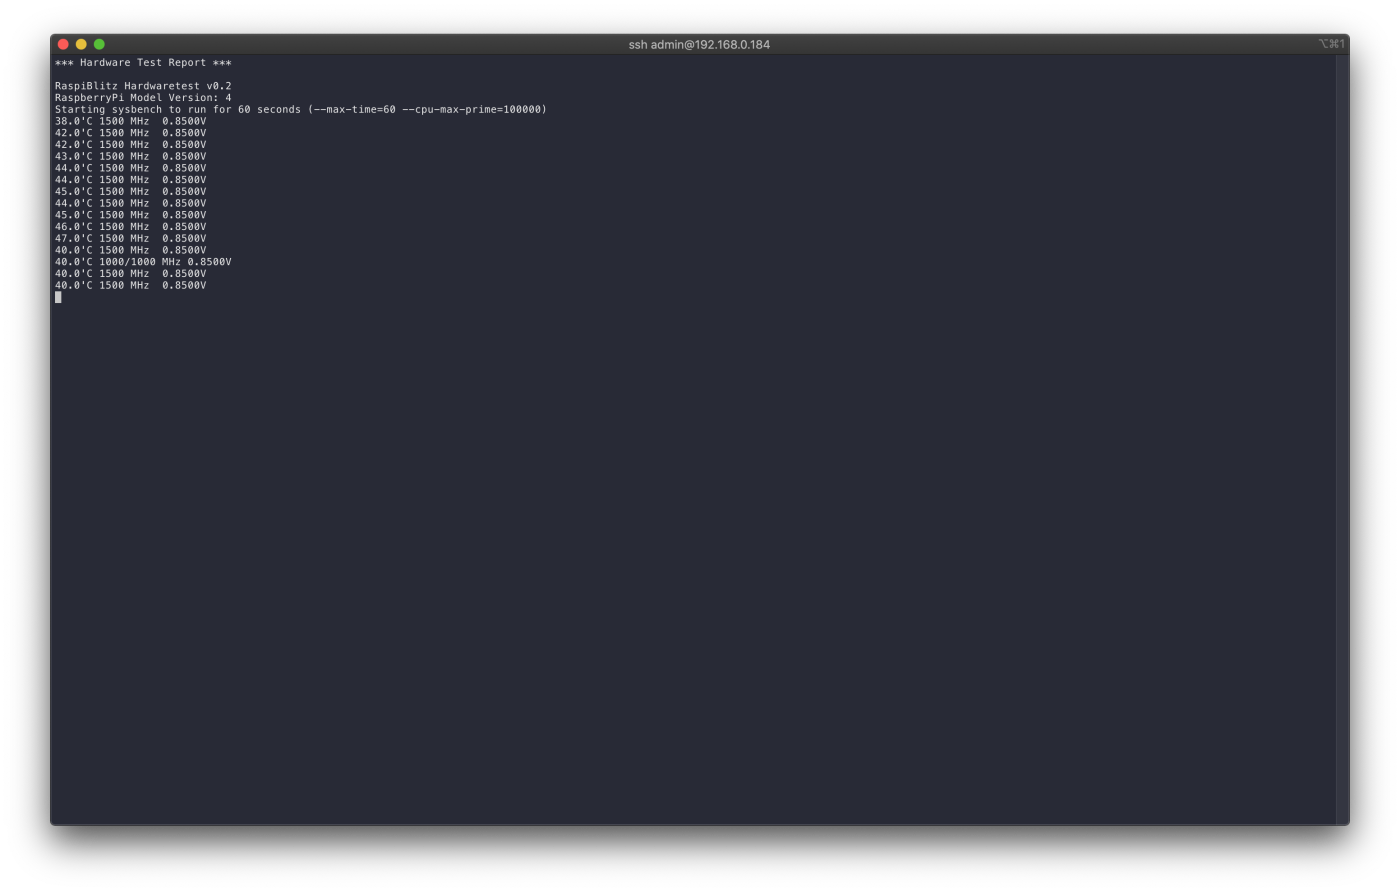
After it’s done with the diagnostics, it will confirm success.
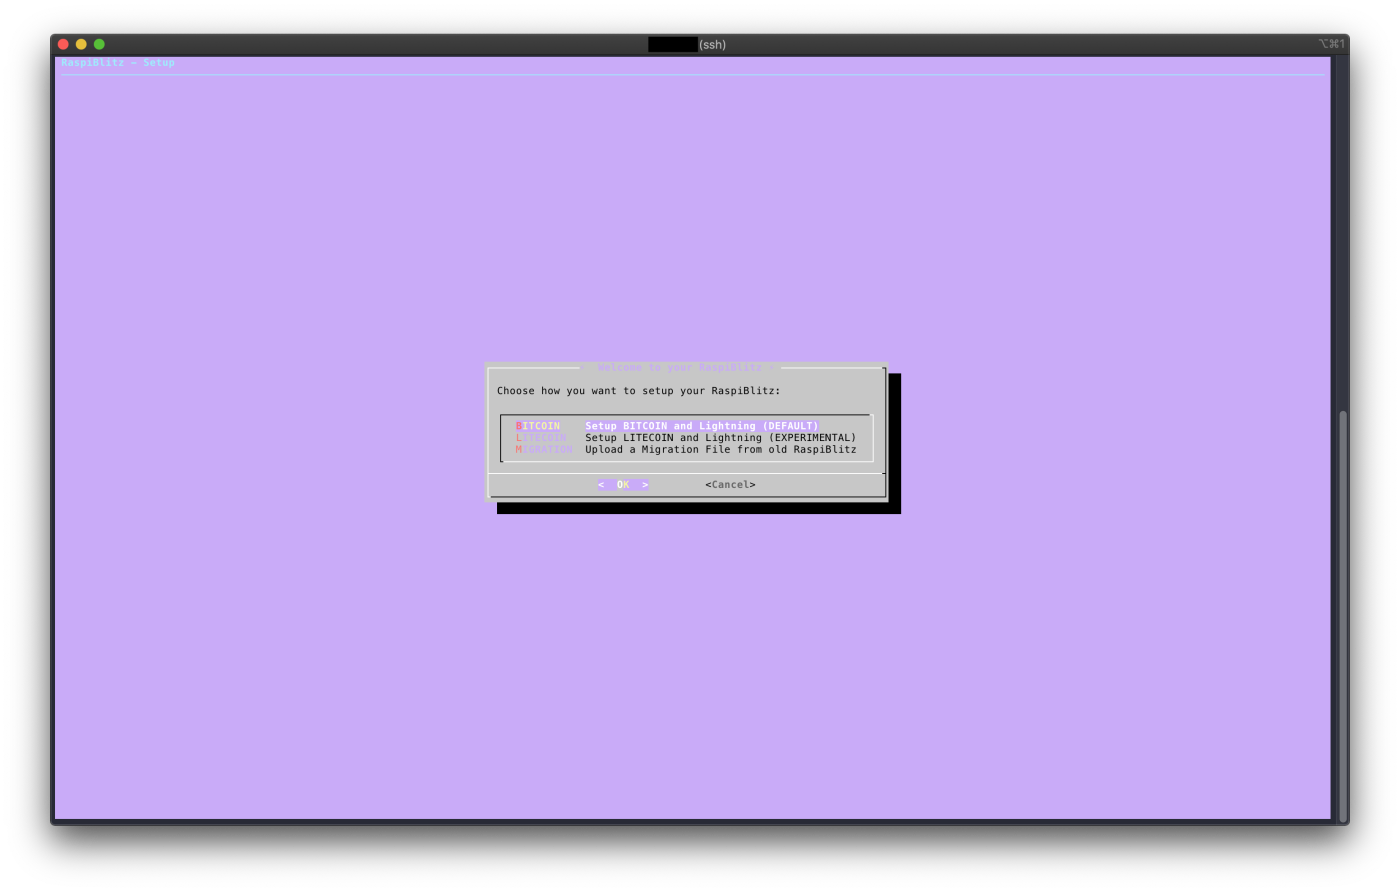
4. Choose Bitcoin and Lightning
5. Give your node a name
6. Set passwords (A), (B), and (C)
Make sure you write these down and store them securely.
- Password (A) is the SSH password.
- Password (B) is the RPC password.
- Password (C) is the Lightning wallet password.
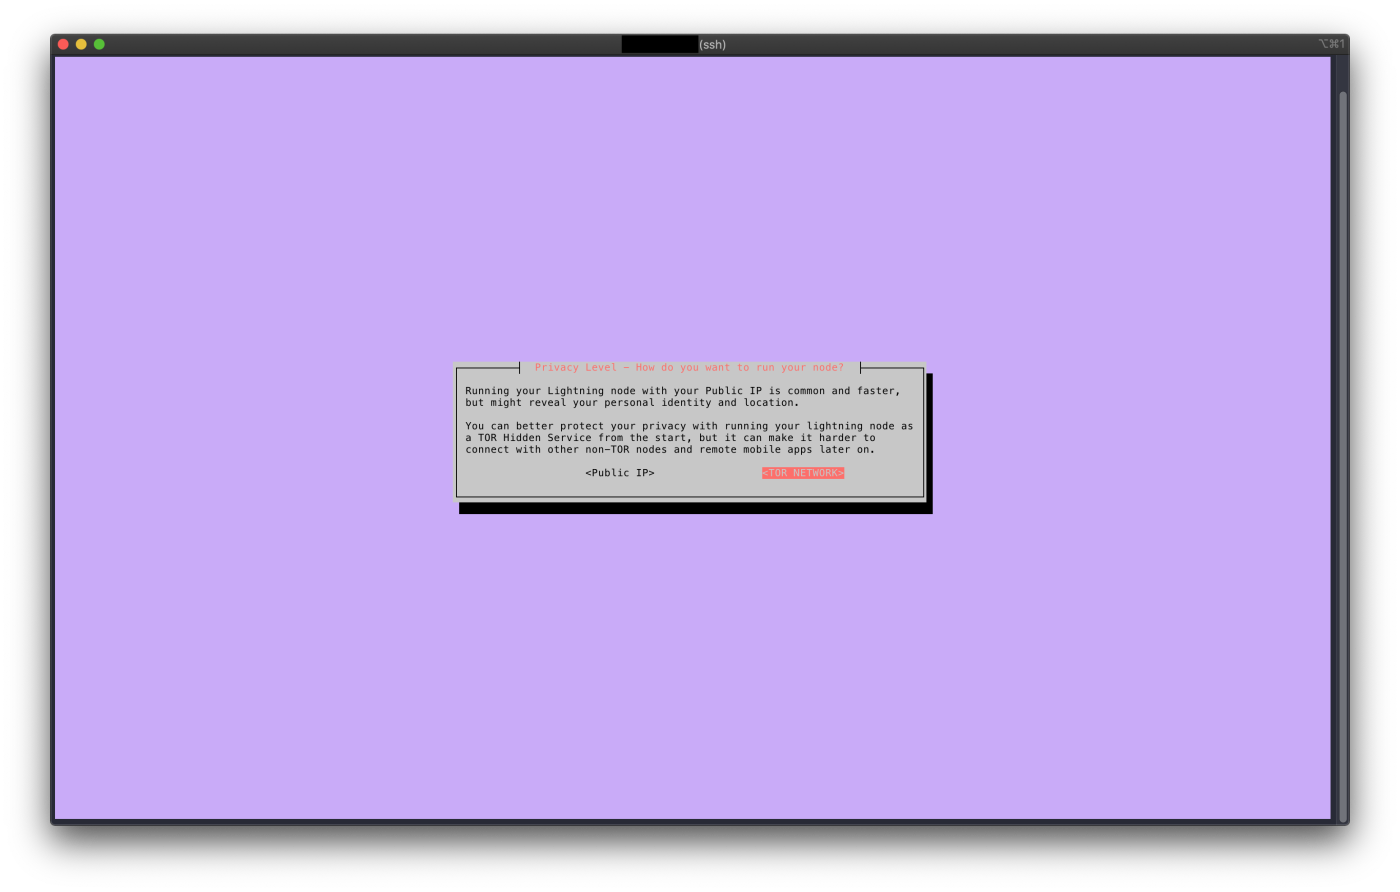
7. Choose privacy level
I strongly recommend going over Tor, unless you really know what you’re doing. Going over your Public IP exposes a lot of information, this can include your exact location based on your IP.
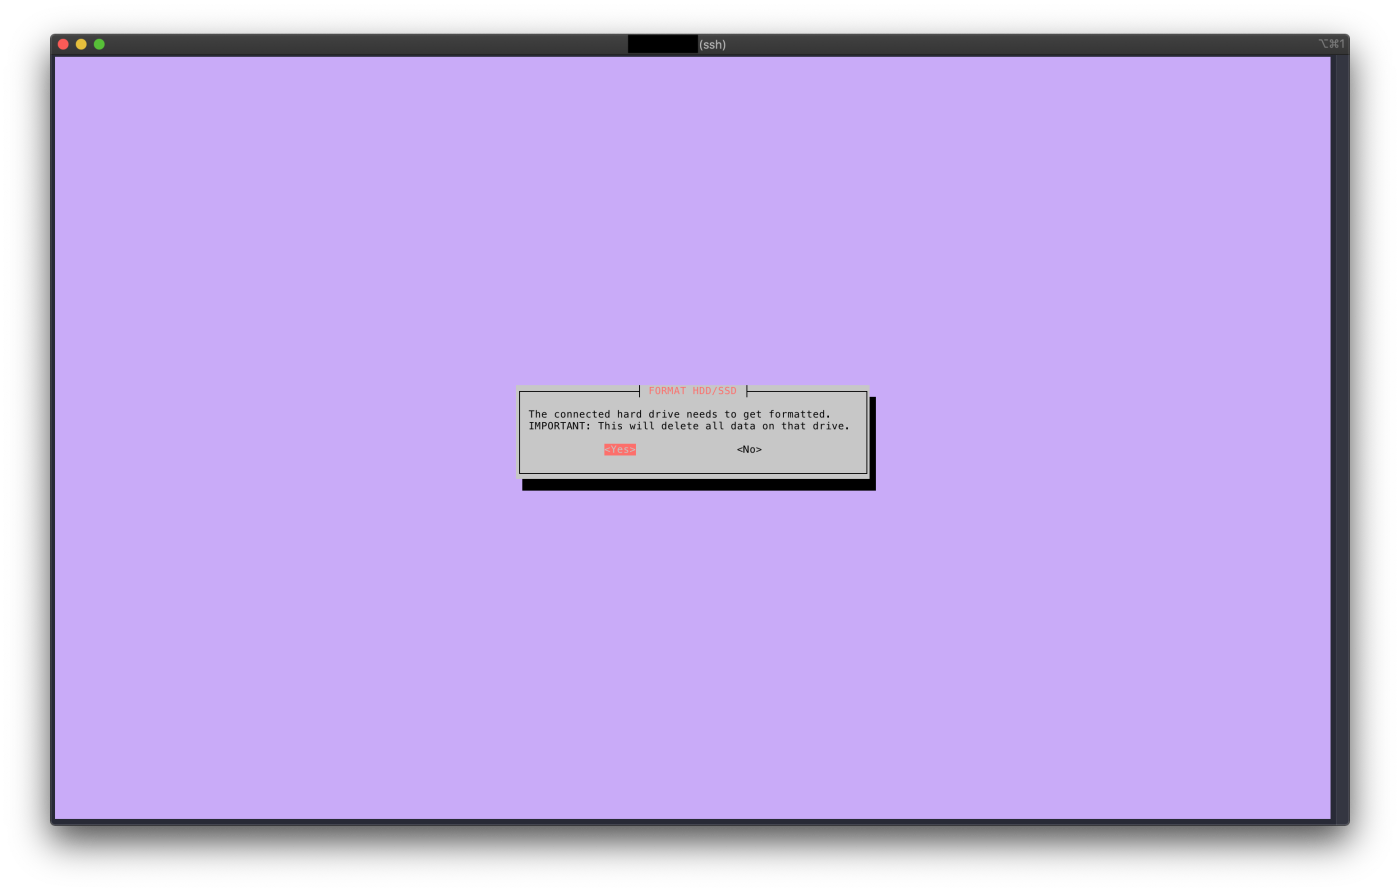
8. Format the Hard Drive
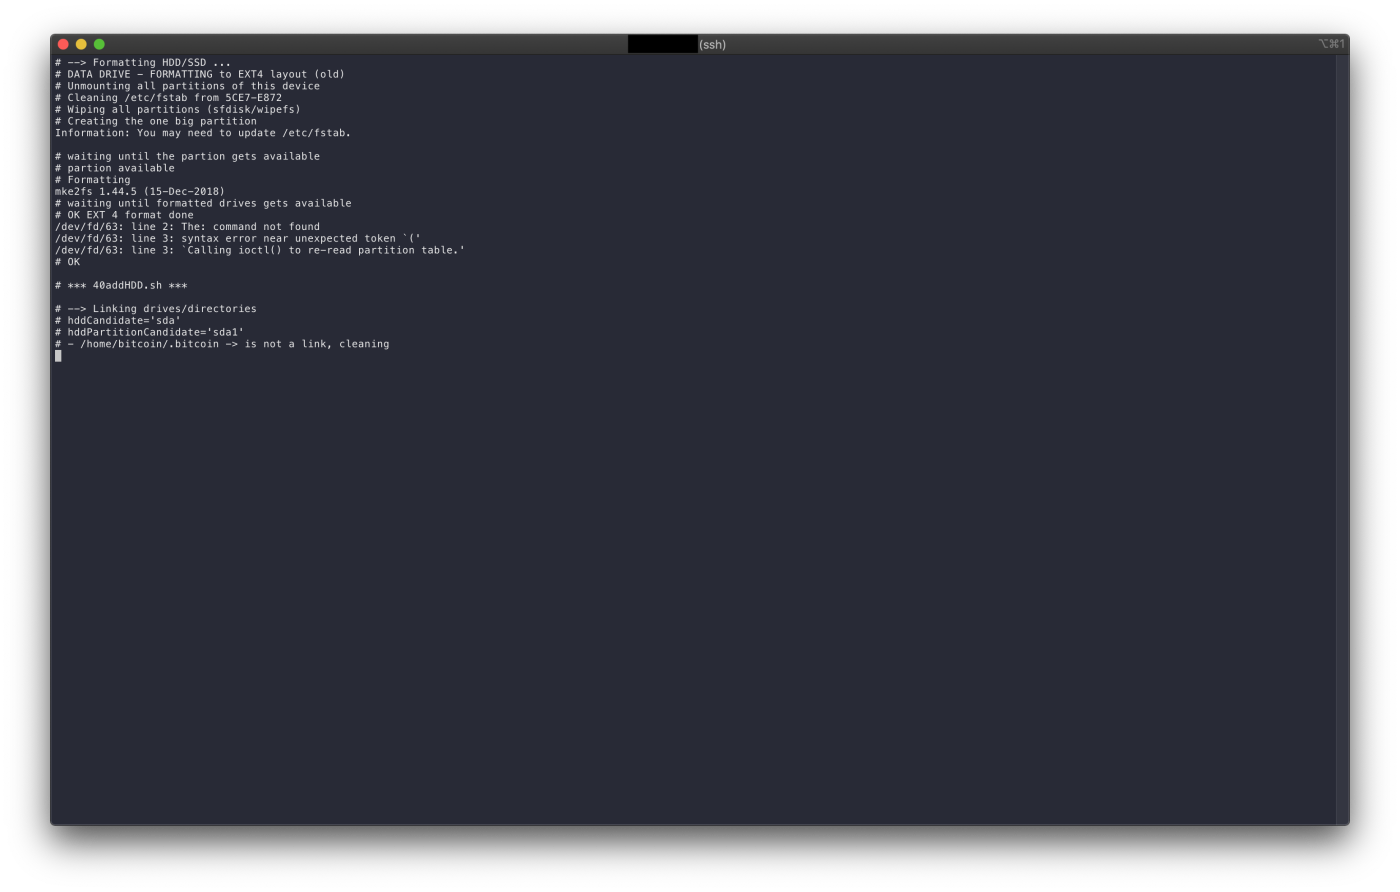
The set-up process will provide feedback while partitioning and formatting the hard drive.
9. Initial Block Download (IBD)
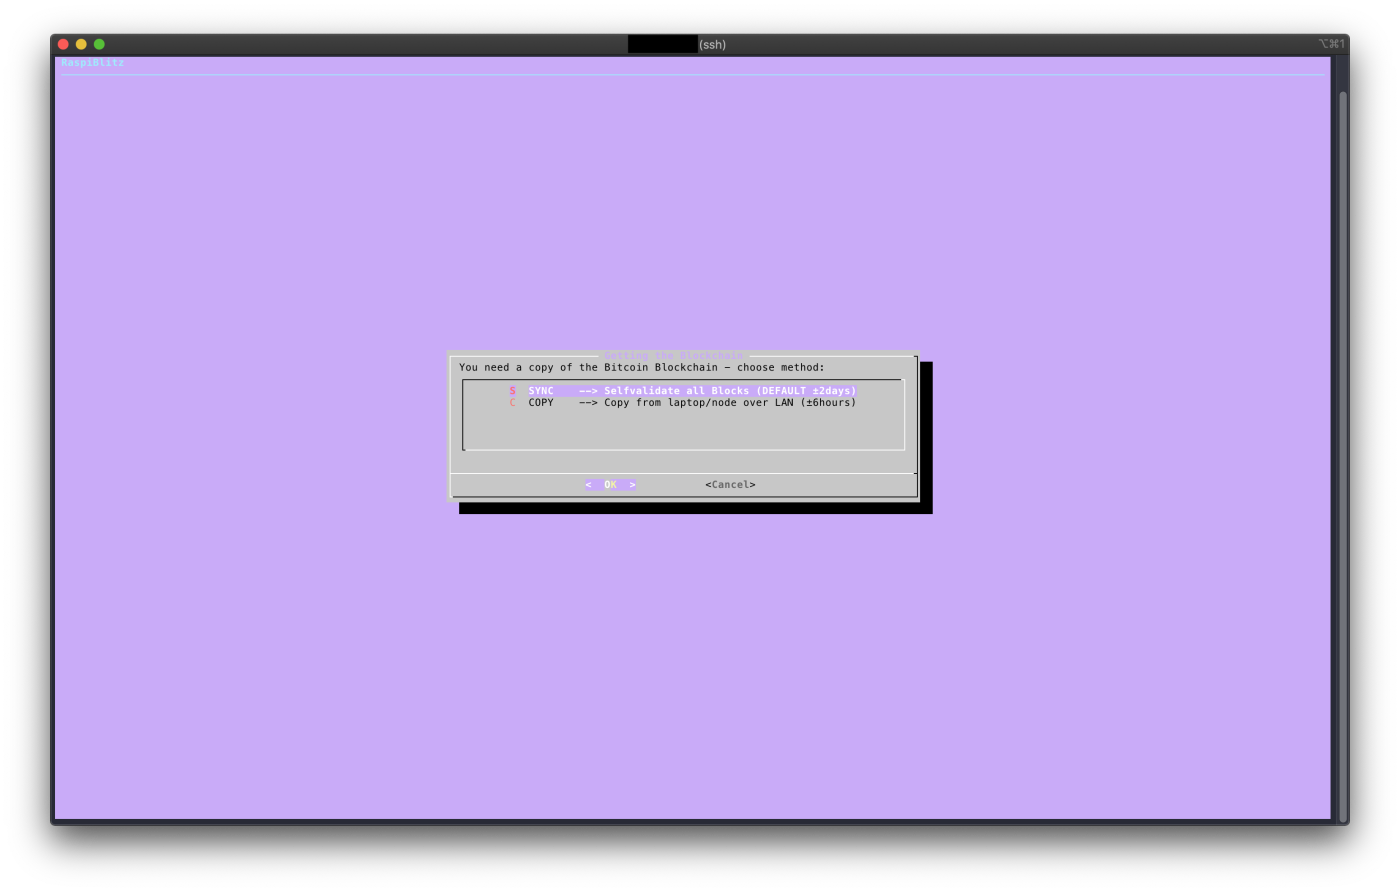
This is the step where you download a copy of the Bitcoin blockchain to your node. If this is your first node, choose SYNC.
If you have another Node running you can expedite this process by downloading over you local network using rsync, in this case choose COPY.
Note that the IBD can take a few days to complete. As of the time of this writing it will need to download >350 GB of data.
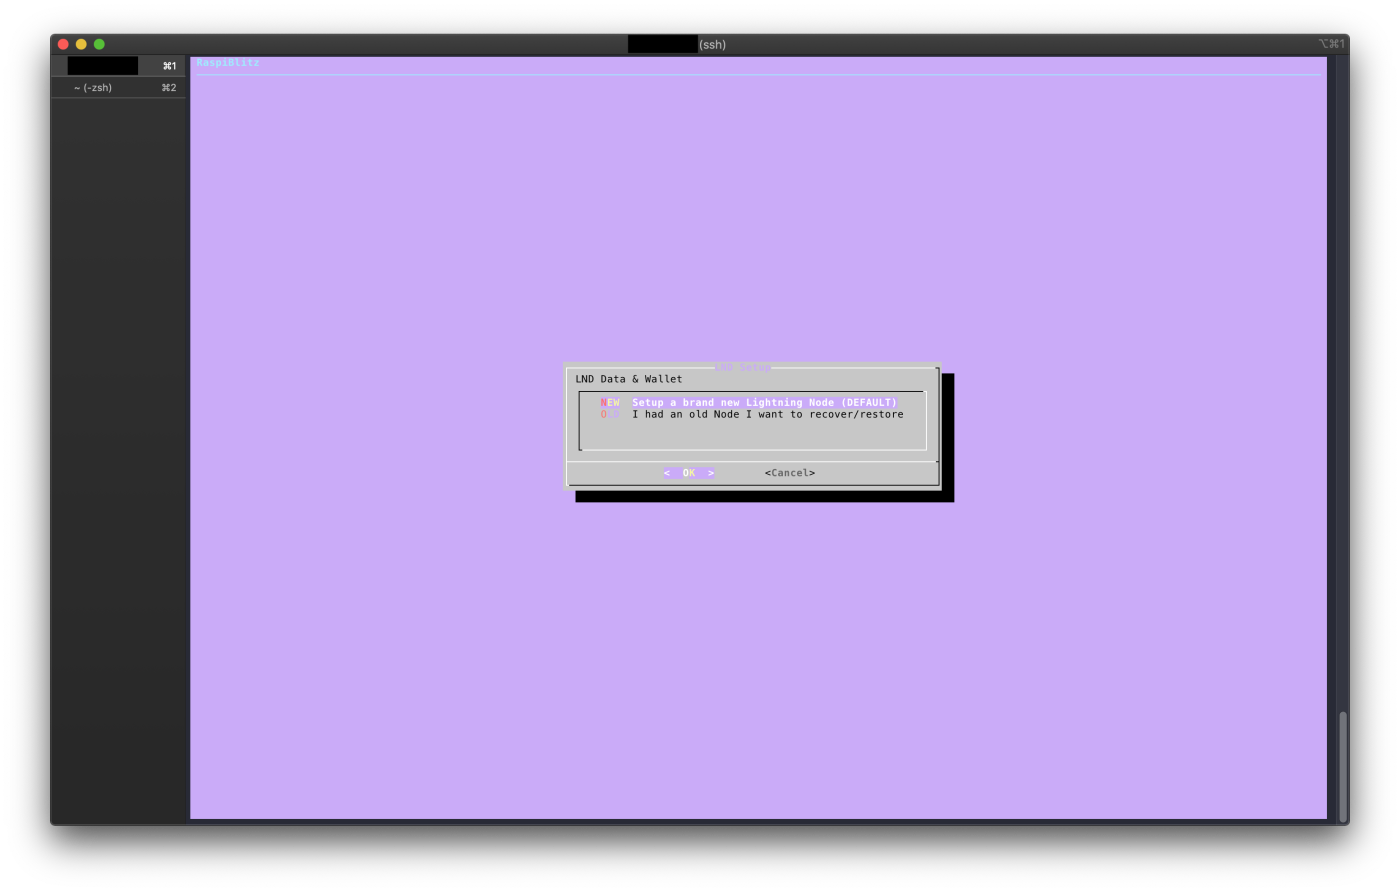
10. Set-up new or restore Lightning Wallet
If you set-up a new wallet, make sure the back-up the 24-word seed phrase securely. The RaspiBlitz refers to the seed as Password (D).
11. Reboot

12. SSH back in
ssh admin@192.168.0.184
Use Password (A).
12. Unlock your lightning wallet using Password (C)
13. You’re done. Bliss.

Here are some things you can do with your RaspiBlitz
Connect Specter Desktop on Mac OS to your RaspiBlitz node
Specter | Dec 14, 2020
Update the RaspiBlitz
Coldcard | Dec 29, 2020